Roofs being over our heads get damaged easily by the sunlight, storm, and high wind. These structures need to be repaired every now and then to ensure our safety.
It is for this reason that a bunch of tough and strong materials is used for the composition of roofs. These materials have their own features and properties that determine the roof’s durability.
For instance, roofs made of metal are considered to live up to 50 years, on the contrary, asphalt roof shingles, no matter how well-maintained, tend to deteriorate easily after 20 years of installation.
It is for this reason that some people lay metal over their roof shingles, to increase the life of their roofs because replacing or repairing roofs isn’t cost-effective. Also because the process isn’t convenient at all.
Benefits of Installing Metal Roofs
- Installing metal roofs helps save money, time and energy. As metal is more durable, one has to only install it once after every 50 years, the time period can increase with good care.
- In addition, metal roofs need less maintenance, consequently lower expenses as compared to other roofing materials. For instance, asphalt roof shingles require more maintenance and need to be repaired every now and then.
- Metal is environment-friendly and absolutely recyclable, whereas most roofing materials aren’t. Asphalt shingles, for example, cannot be recycled.
- Metal is resistant to fire.
The only problem with metal roofs is that they might rust if exposed to rain and snow for a long time. This can be prevented through regular maintenance and cleaning.
Can Metal Roofs Be Installed Over Shingles?
Absolutely yes! Metal due to its lightweight can be installed over shingles. This process is extremely convenient and affordable.
One doesn’t have to worry about the removal of old roof shingles. Simply layering it with metal will get the job done without any major inconvenience.
Steps Involved in Installing Metal Roofing Over Shingles
1. Planning Before Installing
Making up your mind and doing your research is the first step to installing a metal roof. See what color and design you prefer for your roof.
Such installations will be messy, therefore make sure you take measures to prevent a mess by covering your possessions and property with a tarp.
2. Measure For Precision and Accuracy
Measuring the roof size is the second step of installing a metal roof. This will give you a clear idea about the amount of material you will be purchasing, and calculate the money you will be spending on replacement.
3. Remove Vents, Flashings, and Ridge Cap
Before you move any further, safely remove roof features that can interfere with the replacement.
4. Inspect Inner Structures
Before metal is installed, it is recommended to give a thorough inspection of the shingles, roof deck, and underlayment. If these damaged or malfunctioning parts are left unattended, you will land yourself in big trouble.
Major problems related to these roof parts are:
- Broken shingles
- Leaking roofs
- Damaged underlayment
- Bouncy roof deck
- Rotten wood of the roof deck
5. Layer Your Roof With a Roofing Felt
First comes stapling the roofing felt to the shingles. This helps make the roof water-resistant and prevents heat from entering or leaving the house. While layering the roofing felt, make sure you consider vents and chimneys.
6. Now Comes the Metal Panels
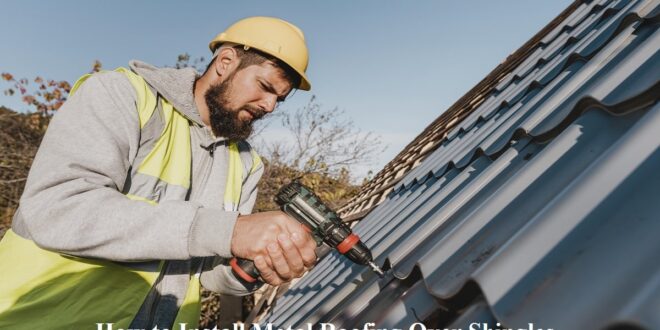
Above the roofing felt comes the metal, which is fastened with large screws. This is to ensure the metal is fastened firmly to the roof deck, beneath the shingles and underlayment.
Metallic roofs are usually striated. So, it is fastened to the roof in a way that these striations align vertically. This is to allow water to flow down and prevent it from standing on the roof.
7. Extra Protection
For extra protection from water (and dirt), it is imperative to make use of some blockades, like foam closure strips. These rubber strips are used to block the free space between the metal panels and the roofing felt. These go along all the roof sides, near the ridge cap, around the dormer and chimneys, etc.
8. Placing the Flashing
Over the metal panels, flashings are installed. These are flat materials used to prevent water from entering the roof through crevices or joints.
Areas like dormers, vents, chimneys, etc. are lined with flashing, to direct water to flow towards the gutters, instead of standing on the roof.
9. The Last Step
This includes placing the ridge cap over the top of a roof, or where two roof sides are coinciding. This prevents water from entering the other side of the metal.
10. The Cleanup Part
Metal installation on the roof can be a messy job, and it’s after cleaning that should be done as soon as the roof installation has been done. The waste materials can damage your flooring, thus need to be cleaned properly.
 Make Home Smart Let's Make Smart Home for Everyone!


